So you’d like to learn how to draft a Peter Pan collar?
Chance has it that you probably already own a garment with this timeless feature. Its classic and pretty shape has survived fashion era after fashion era, and never fails to give a piece of clothing that pretty yet elegant look. You’re probably with me on this one? 😉 Oh! And in case you’re wondering – the answer is yes! You can indeed draft a peter pan collar for any pattern with a round neckline. Isn’t that great? Now is your chance to learn how to add this gorgeous detail to your future makes or the pieces in your wardrobe that you feel need that extra little touch of delight!
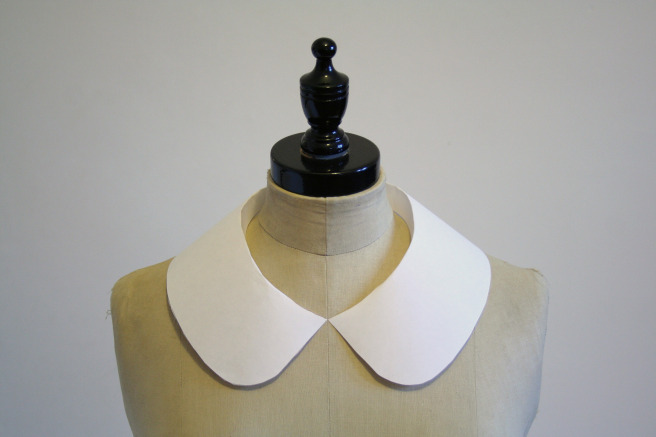

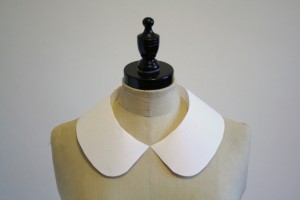
The examples above show that when you draft a Peter Pan collar, you can choose to have it rounded or pointy. The drafting method is exactly the same regardless of the style – flat, from a pattern’s or a block’s neckline! The collar is created from the curved necklines of the front and back pattern pieces of a bodice or dress. One of the most important things to remember when learning how to draft a Peter Pan collar is that, if you are working with a pattern that has seam allowances on it, you’ll need to redraw around your shape and remove the seam allowance. Sometimes I want to produce the thing so quickly that I work with the seam allowances on and I do manage to confuse myself!
So, here we go!
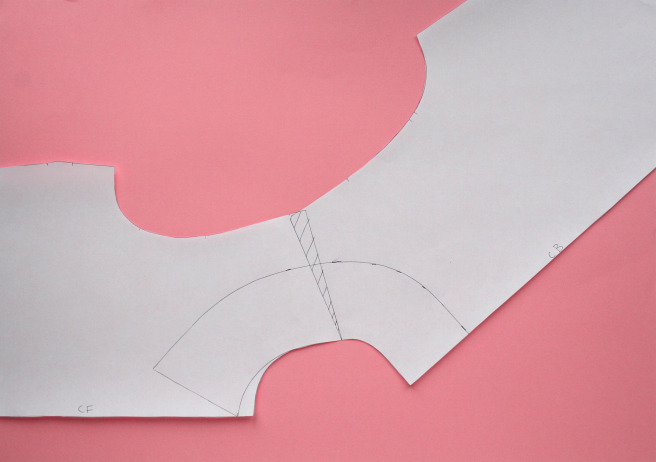
Step 1. Place the front and back pattern pieces together to touch at the neck points, with the shoulders of both lined up. Overlap 1.5cm at the shoulder point on the armhole. This is done to help prevent “skirting” which means the outer edge would be slightly too long and would produce a wobble on the outside edge of the collar. Lower the centre front neckline point by 1.5cm and mark. This will help the collar to roll slightly when it’s made up. Draw in the desired depth of the collar, this one is 7cm and measure this from the neckline edge, moving round the curve.

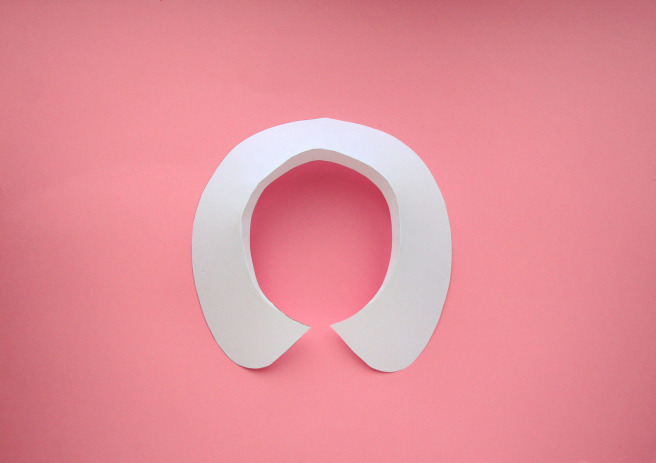
Step 2. Trace off the collar shape and create the shape you want. There are different shapes you can use when you draft a Peter Pan collar. In the picture above, I have demonstrated the two most popular.


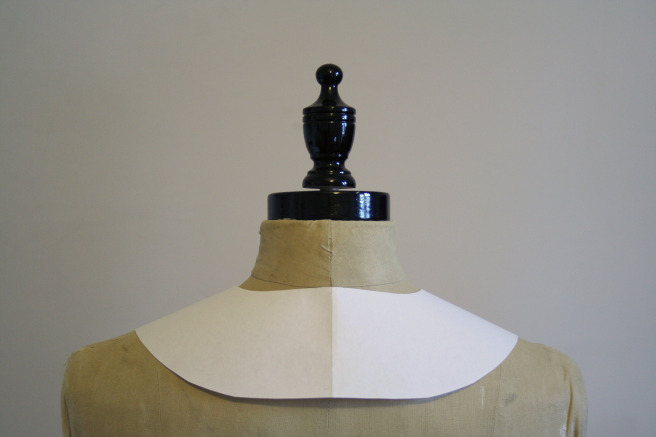
I like to cut out the half shape to check how it is sitting and to see if I like the size. The best way to check how it looks and sits is to either place it around the neck of your dummy or on yourself, or if you have someone available nearby, ask them to model it for you.
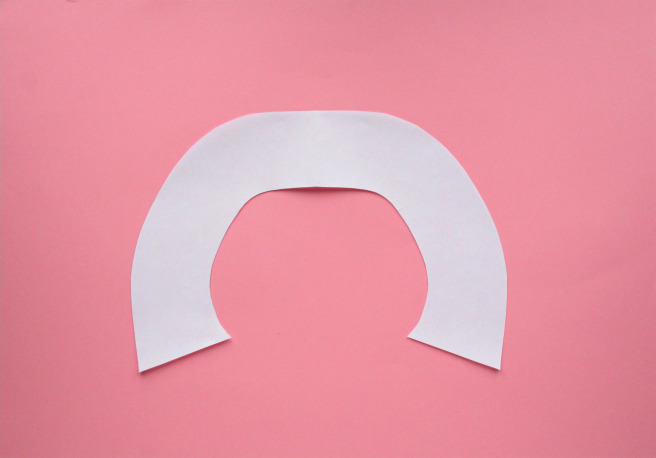
Once you’re happy with it, cut it out on the fold to check the entire shape. At this point, I would keep it at the finished size with no seam allowances added.
I would love to say it should be perfect at this point, and there’s actually no reason why the inside neckline should be wrong, but the outside edge and correct depth are often difficult to get right first time. I would spend a bit of time tweaking until it is a perfect match to the image in your head!
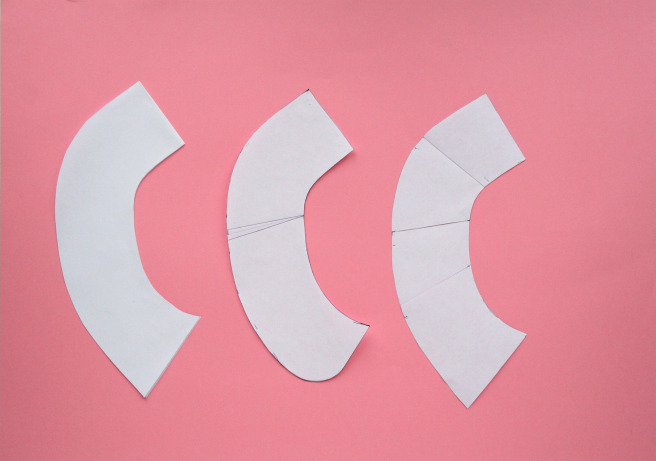
Just in case, I have included extra details for you to refer to if the collar isn’t looking exactly how you want it to. If you want your collar shape to sit higher, and closer into the neck, the outer edge of the collar must be reduced. To achieve this, slash the collar first at the shoulder point and overwrap the outer edge.

When you draft a Peter Pan collar, the neck edge points stay the same at 0, so that the length does not change and will still fit onto the front and back neckline pieces. For the collar to sit even higher and closer into the neck, slash again at the back and front and overwrap again. I overwrapped each cut piece by 1.2cm at the outer edge and by 0 at the neck edge. You can see the neck edge becoming straighter in the image above. As the collar edge becomes straighter the stand against the neck increases.
As you change the neck stand, keep checking how this looks on the body. As the stand on the back neck increases you will loose depth on the collar fold back. This can be compensated by marking the stand and then adding the same amount to the depth of the collar. This will keep the width even, on the outer, seen part of the collar, if that is how you want it to look!
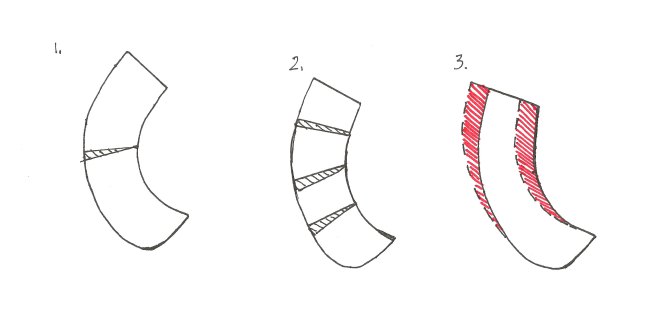
The illustrations show the same process but in diagram form. The neck edge red shaded area illustrates the increase in the collar stand as it moves from the back to the front. The outer edge shaded area is simply the amount added on to the actual collar to compensate for the emerging collar stand.

Step 3. We are now ready to add seam allowances. Yay!
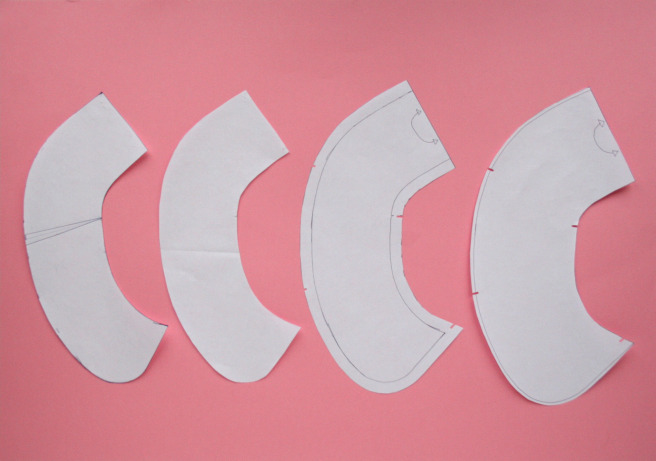
When you have decided on the final shape of the peter pan collar, redraw the pattern pieces. The under collar, the third pattern piece in the photo above, has a 1cm seam allowance all round with the shoulder seam notched at the neck edge and it is one piece cut to the fold. I usually use a 1cm seam allowance on anything curved, since more adds too much bulk or will get trimmed away anyway. If I can, I staystitch the inside of the collar on the under collar, this always rolls the outside collar edge seam underneath, out of view. To allow for the roll back simply add the 1cm seam allowance and then add an extra 0.25-0.5cm onto the outside edge of the top collar.
Step 4. Cut the collar to the fold, and for ease of sewing, notch the outside edges of the under and top collars to match.
And there we have it! Step by step instructions on how to draft a Peter Pan collar, guaranteed to bring an extra element of loveliness to your makes or to prettify that plain garment in your closet! Go on give it a go and if you do, please do share your makes from our blog posts on social media and don’t forget to tag us by including the @sewitwithlove handle in your captionon either Instagram, Facebook or Twitter. We adore to see the creations our savvy subscribers and followers come up with!
Did you find this tutorial useful ,or do you have any other failproof way to draft a Peter Pan collar? Do leave us a comment below. We’d love to know!
xx
Hi
This is just what I was looking for and couldn’t believe that someone had such clear, well-explained and photographed examples included as well. Thank you so much – this was easy to understand and follow and will definitely be trying this for the top I’m am about to make.
angela
Thank you this was so well done and easy to understand!
Thanks for the detailed instructions! collars are my weakness! I love them and use them for my clothes.
Thank you for this – exactly what I was looking for to draft a collar for some dolls clothes I am making! I couldn’t decide how to get rid of the ‘wobble’ on the outer edge and this explains perfectly. I am so grateful that you shared this with us.
So glad our tutorial has come in handy for you and your dolls! 🙂
Wow! Just in time. I wanted to add some collars to my sweatshirts as tribute to Justice Ruth Bader Ginsberg. And there is your tute. Thanks Pegeth
Wonderful! Collars to Ruth Ginsberg…true legend! 🙂