Believe it or not, regular cleaning and maintenance of your sewing machine is an essential part of keeping it running smoothly, reducing your servicing bills and trips to the sewing machine repairs centre and ultimately extending its overall life.
So what’s there to be cleaned in a sewing machine you may be wondering? The answer to that lies in a tiny word “lint”! Yes that’s right, lint! Those balls of fluff that often form on your clothes are nothing but as Wikipedia puts it “visible accumulations of textile fibers and other materials, usually found on and around clothing”. So, what’s that got to do with sewing? Ha! It has everything to do with sewing!
Let me explain myself better…As clothing is made out of fabric, the fabric we use in our sewing projects produces lint in the same way as the clothes we wear do, with the only exception that the lint produced by fabric while sewing ends up accumulating beneath the feed dog, the needle plate and inside the bobbing case and housing. Bits of thread may also become trapped in the bobbin case and housing adding to the mess!
If this is enough to convince you to want to learn how to do it, keep reading and I’ll show you how 🙂
WHAT YOU WILL NEED
- A sewing machine brush, or alternatively a hard, medium sized artist’ s paint brush.
- Fine quality sewing machine oil

How to clean your sewing machine Tutorial
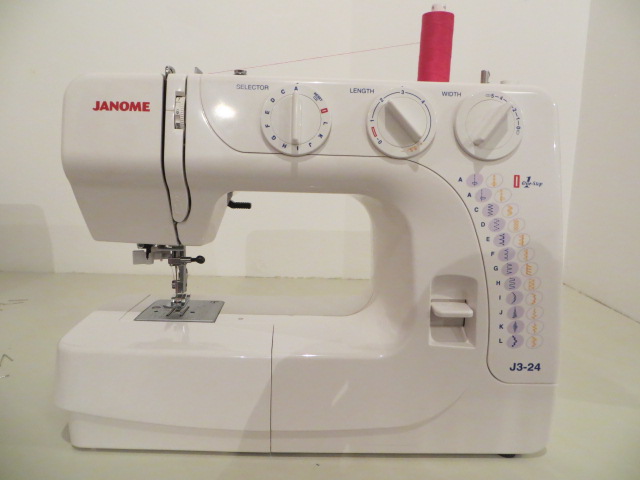
Here is a standard front loading machine many of you may have. If your machine is a top loading one, carry on reading as this will still be helpful to you!
How to clean your sewing machine tutorial
Step 1.
Remove the bed.

How to clean your Sewing machine tutorial
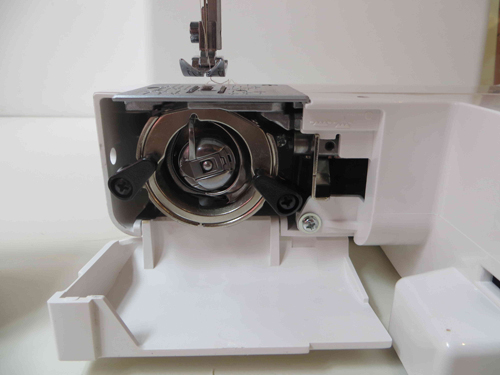
Step 2.
Open the bobbin housing door.
How to clean your sewing machine tutorial
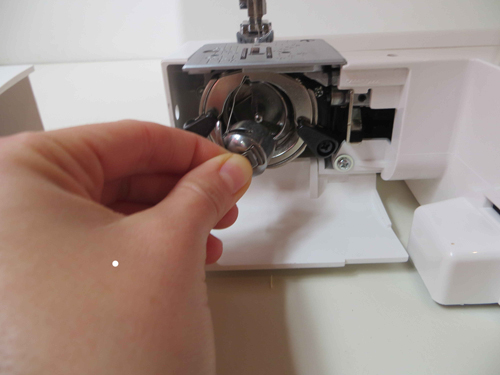
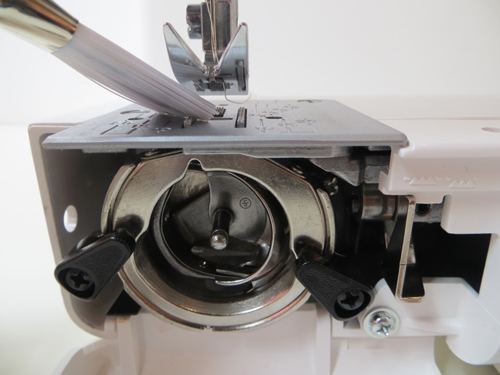
Step 3.
Pull on the bobbin case spring and remove it from its housing.
How to clean your sewing machine tutorial

How to clean your sewing machine tutorial
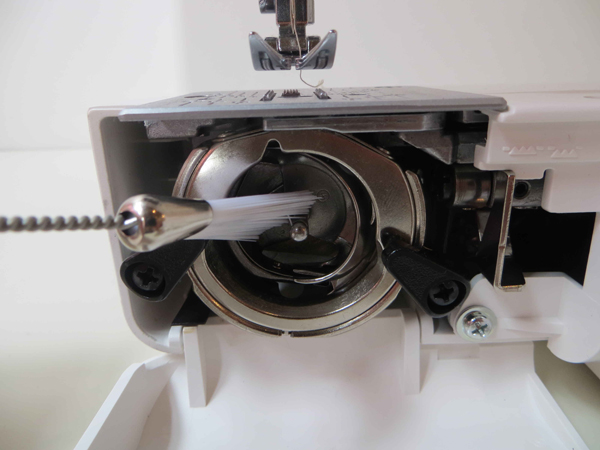
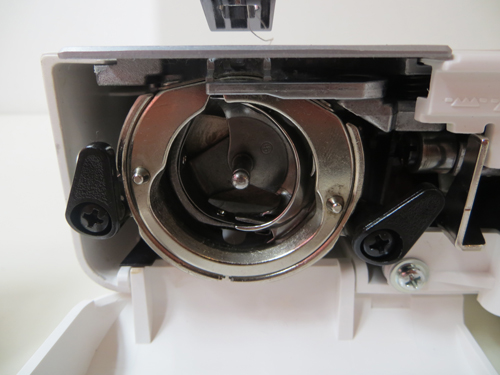
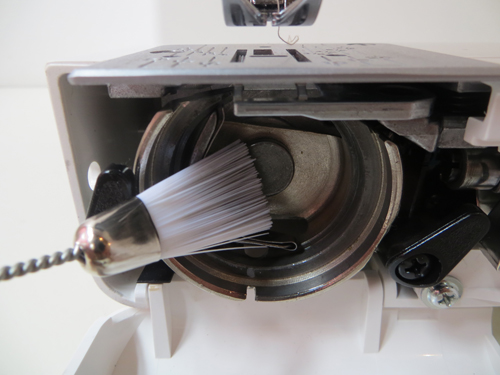
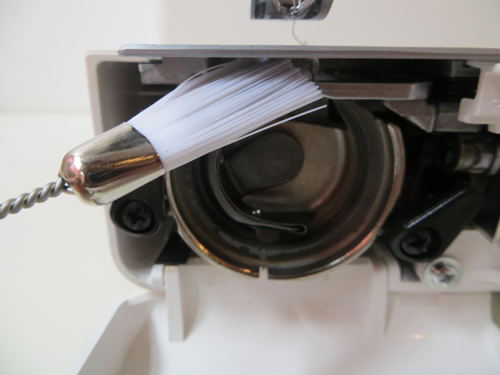
Step 4.
Start brushing around the bobbin housing to remove any lint and/or bits of thread that may have accumulated.
How to clean your sewing machine tutorial
Step 5.
Brush inside the feed dog. *Please note that in a lot of machines, like this one for example, it is very difficult for you to take the needle plate out to be able to clean right underneath the feed dog. Cleaning it from the top and from underneath as shown in the next steps is your next best option.
How to clean your sewing machine tutorial
Step 6.
Push the shuttle hook cover’s stops out.
How to clean your sewing machine tutorial
Step 7.
Remove the shuttle hook cover.
How to clean your sewing machine tutorial
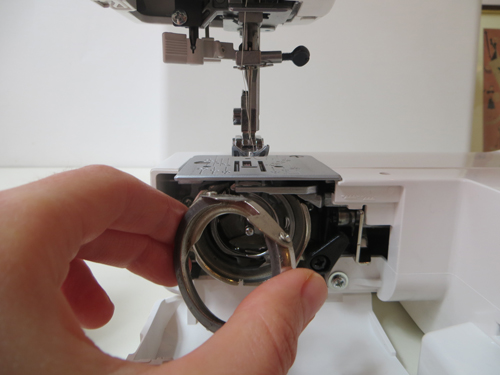
Step 8.
Remove the shuttle hook

How to clean your sewing machine tutorial
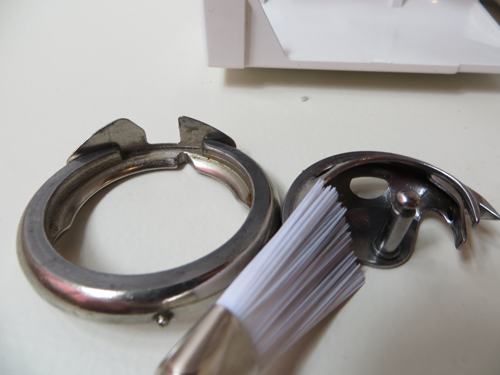
Step 9.
Brush any lint off the shuttle hook and cover.
How to clean your sewing machine tutorial
Step 10.
Brush any lint/dirt off the bobbing case housing.
How to clean your sewing machine tutorial
Step11.
Clean underneath the needle plate and feed dog.
How to clean your sewing machine tutorial
Step 12.
Replace all parts into the bobbin case housing.
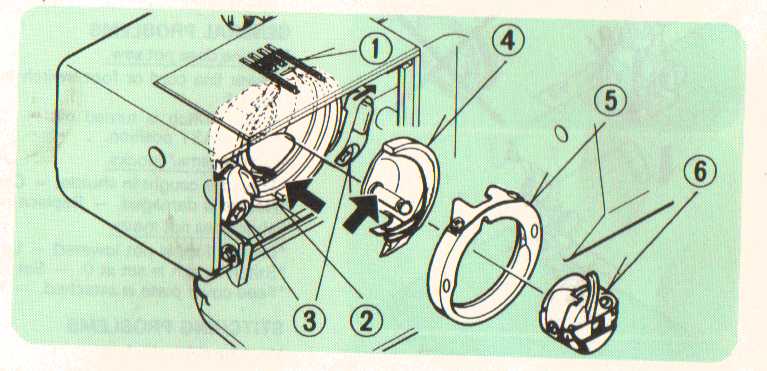
How to clean your sewing machine tutorial (Image Courtesy of Singer 322 Parts Manual)
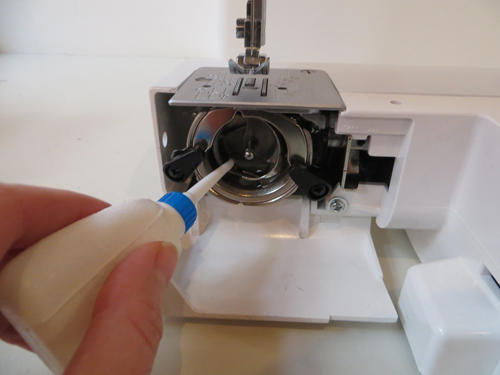
Step 13.
And finally..last but not least…place one drop of oil into the bobbin case housing and turn the hand wheel towards you a few times to help the oil spread around. Next take a piece of scrap fabric and sew a few seams to clean out the oil from the thread as the first few seams will carry a little oil from the the bobbing case.
How to clean your sewing machine Tutorial
Et voilà! That simple! Your sewing machine will thank you for it and your stitch quality will too! Be sure to follow this procedure after each big project, or every three bobbins, or once a week if you use your machine regularly.
Happy stitching 🙂
Leave A Comment